Now in test folder, we will be adding a simple test js file
Now in test folder, we will be adding a simple test js file
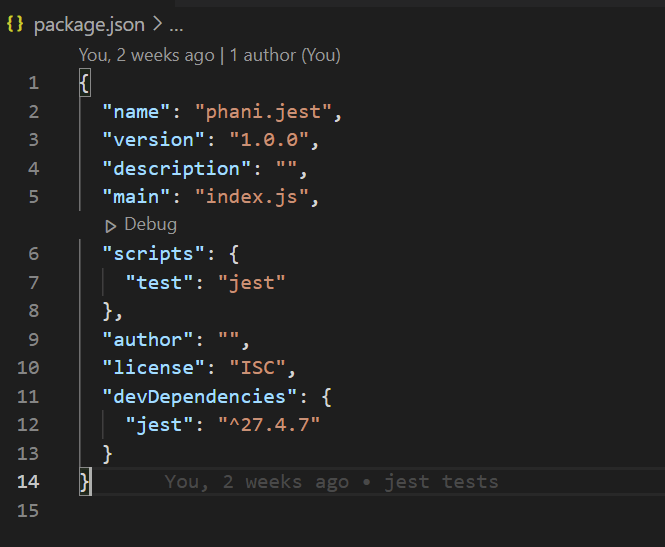
Here we created a file named phanidiscounts file in test folder.
The pattern for Jest is
describe() – what group we are testing and can have nested describes for each feature
and for main parent we can set some values in beforeEach() and afterEach() functions to execute something for once
And for child beforeEach() here it executes before each feature is completed. It means here after test() function we can set a value back and test() describes the test.
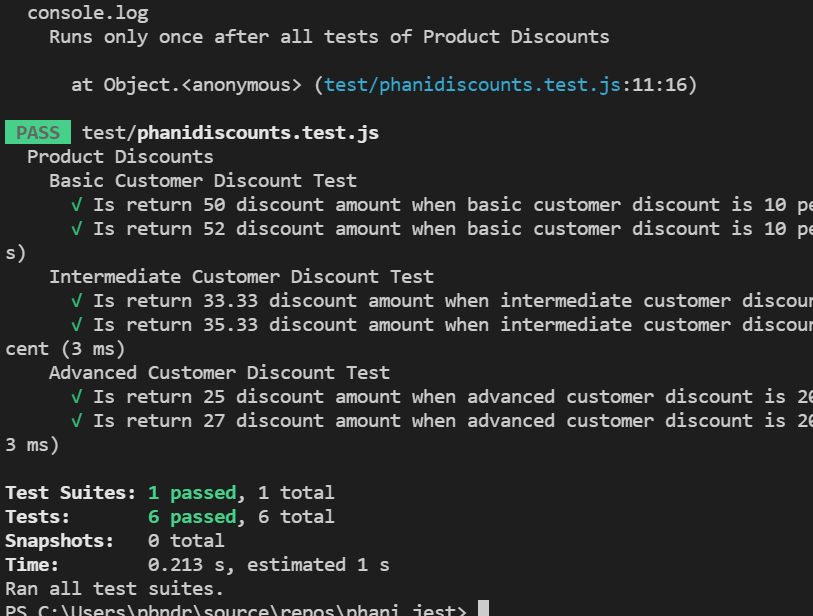
Chai is a BDD/TDD assertion libraty for javascript testing framework
Lets build a simple application to test this
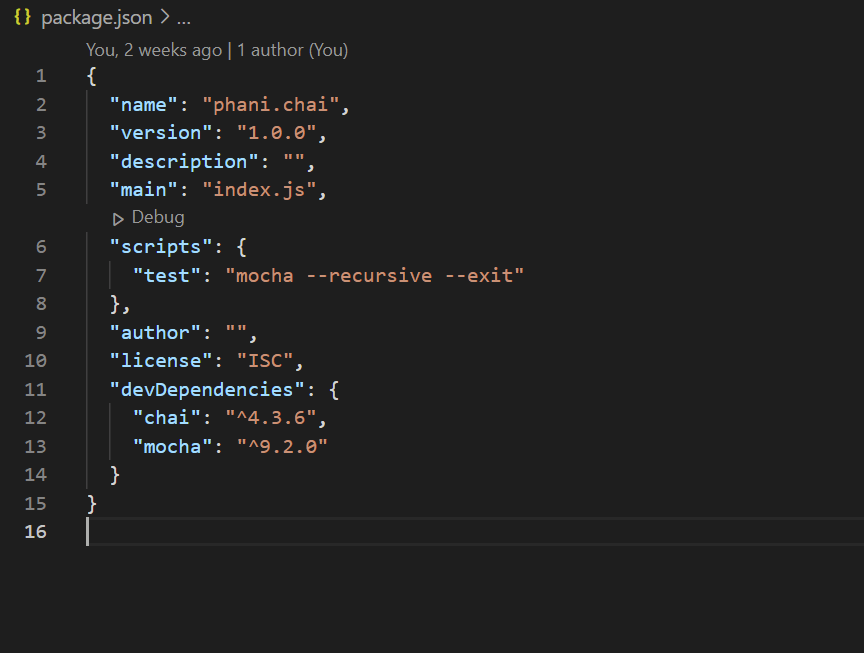
Install chai and mocha test runniner packages as dev dependencies
Now in test folder, we will be adding a simple test js file
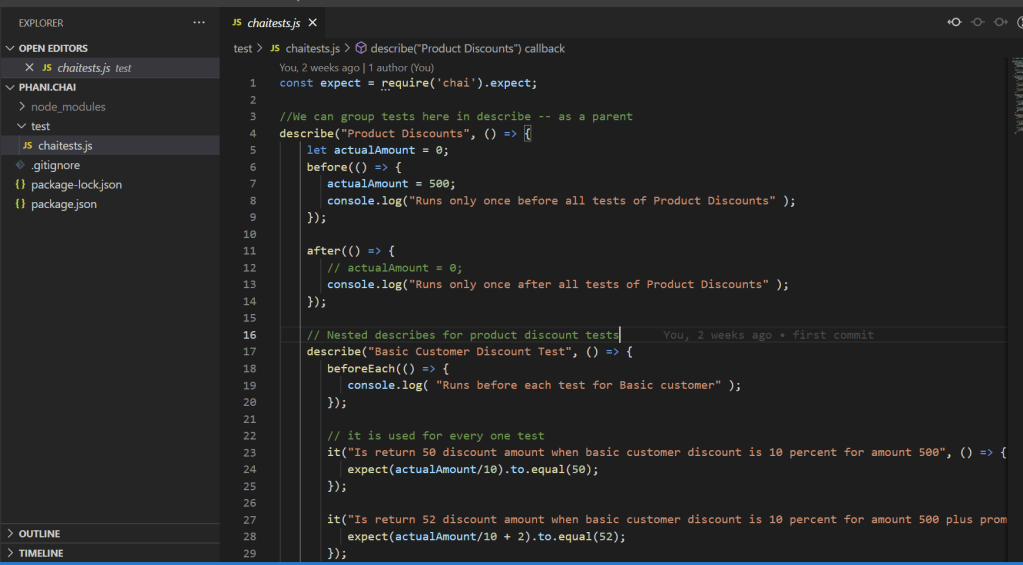
Here we created a file named chaitest file in test folder.
The pattern for chai is
describe() – what group we are testing and can have nested describes for each feature
and for main parent we can set some values in before() and after() functions to execute something for once
And for child beforeEach() here it executes before each feature is completed. It means here after it() test function we can set a value here and it() describes the test.
There are many API Gateways available like Ocelot, Kong, Express API for Express Js
Here we will look into Ocelot
There is a possibility of single point of failure with Gateway API. So some projects dont prefer this approach
For microsrevice architecture, it’s good to use Gateway API
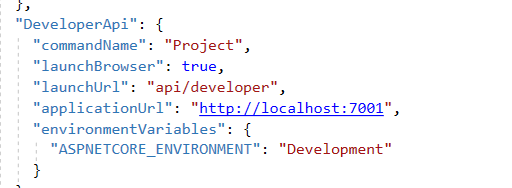
Here I will be showing simple microservices like Developer API, Tester API and Gateway API
For Developer API, run it in port 7001
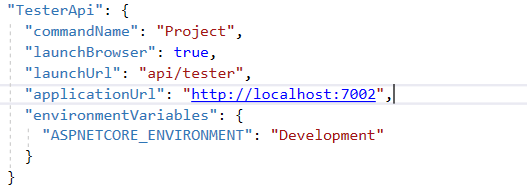
For Tester API, run it in port 7002
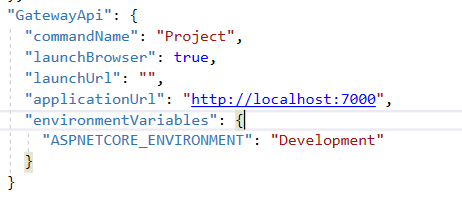
For Gateway API, run it in port 7000
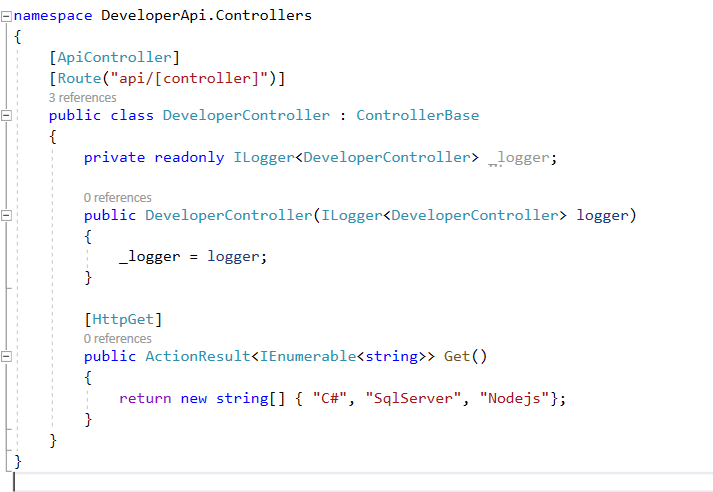
Lets add simple controller to return simple data
For DeveloperController look at below image
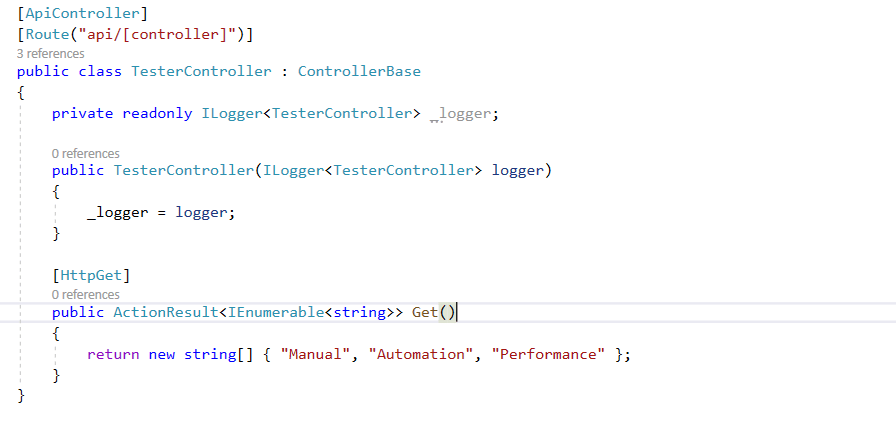
For Tester Controller
Now in Gateway API we add a ocelot.json for the microservice path urls and redirects
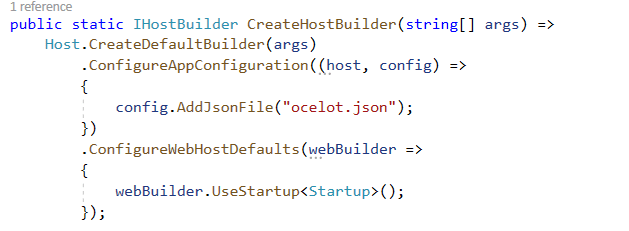
And we need to add JSON file path to Builder to read
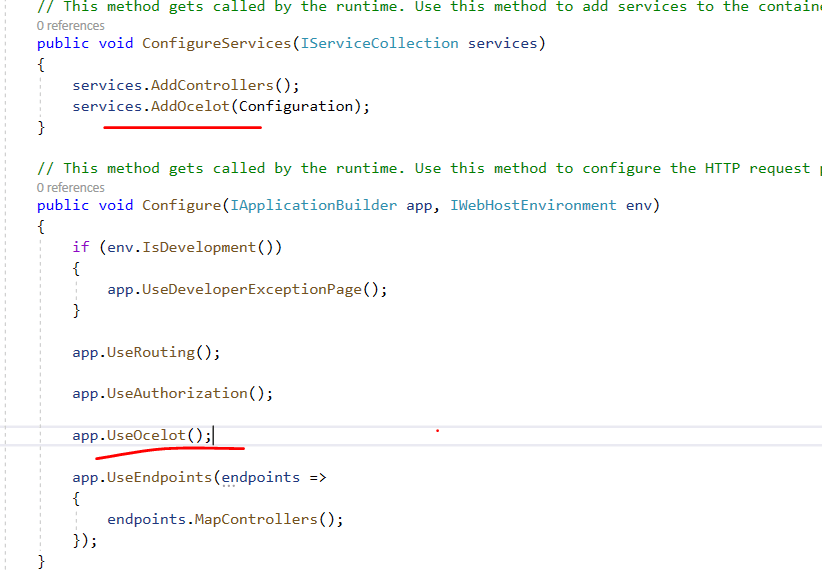
Add Ocelot service as Middleware to startup
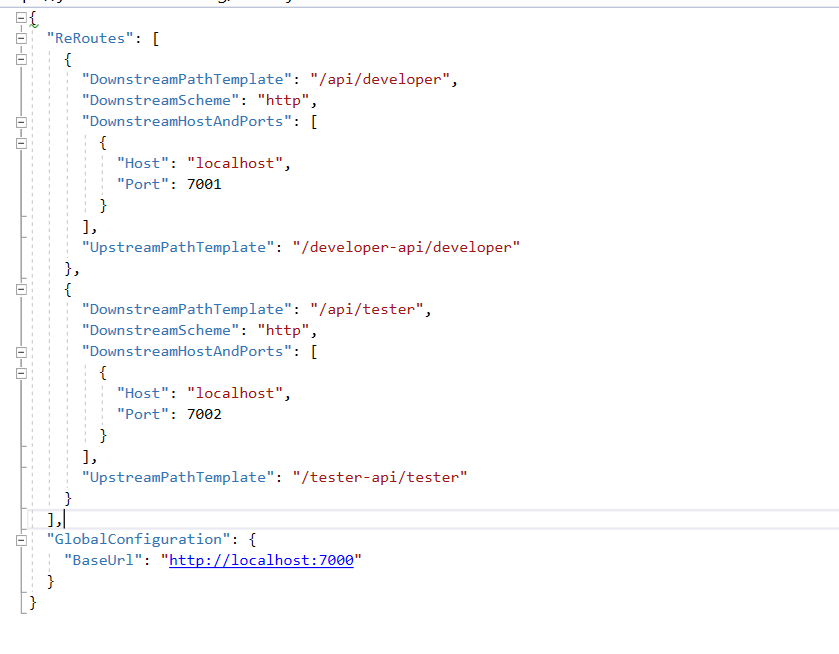
Now in ocelot.json lets add the configuration redirects for microservices. So here we add Developer API and Tester API paths with the ports of 7001 and 7002 where they are running
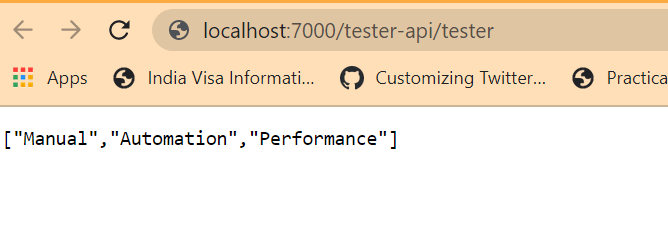
If you run our APP, for Tester API
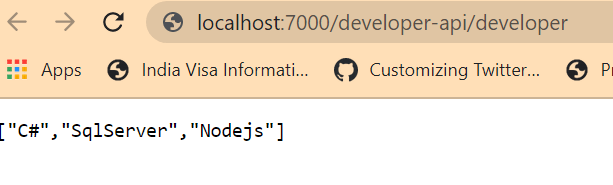
If you run your developer API
Now if we run our Ocelot Gateway API, we can see the output with port 7000 running developer api
For Tester API,
Hope you enjoyed this article about how we can access microservices through API Gateway
SOLID principles are used to design software which is understandable, flexible and maintainable
There are 5 design principles used to design the software
I created a project which explains all these principles. I added folders and added BEFORE/AFTER and violation classes with V as ISPVAdvancedCustomer – this means InterfaceSegregationPrincipleViolation
1. Single Responsiblity Principle: It states that each module should have only one responsibility
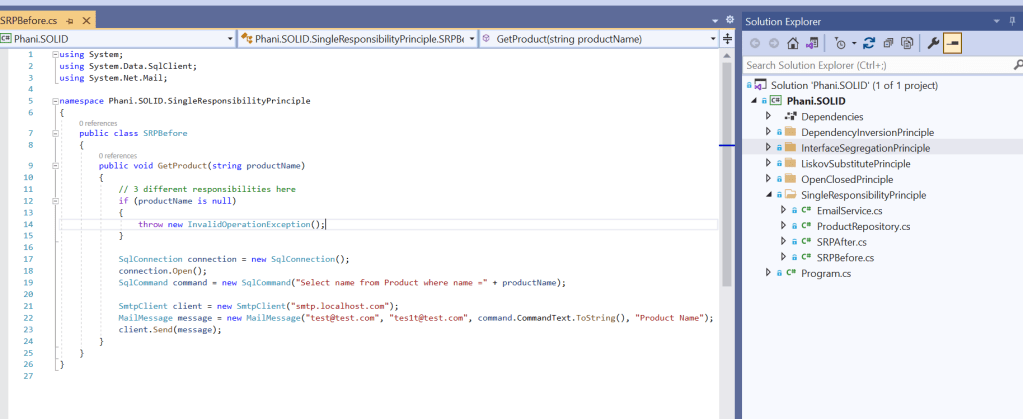
Look at the below code.
Here you can see, SRPBefore class has 3 responsibilites.
Throwing exception if product is null
SQL Query to get product
Sending Email
It simply violates our SRP principle as it has 3 responsibilities.
If SQLConnection is changed to other DB types like Oracle or SMTP client is changed, it will reflect this class.
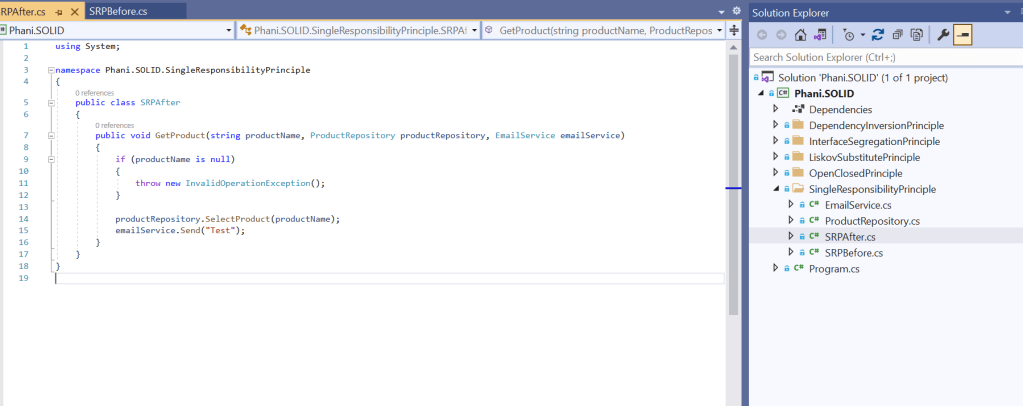
So we need a way to not depend on these things. See the below code.
Here you can see we are not depending on database types or SMTP clients as these are passed by the client. So if any DB/SMTP changes, it doesnt affect this code.
2. Open Closed Principle: It states that software entities like modules/classes are opened for extension but closed for modification
If any new requirements come, we need to add the changes easily without affecting the working code .
See below code which violates OCP
Here you can see 3 if conditions to check for a product type
if new producttype is introduced we are going to add another if condition where we are changing the working code.
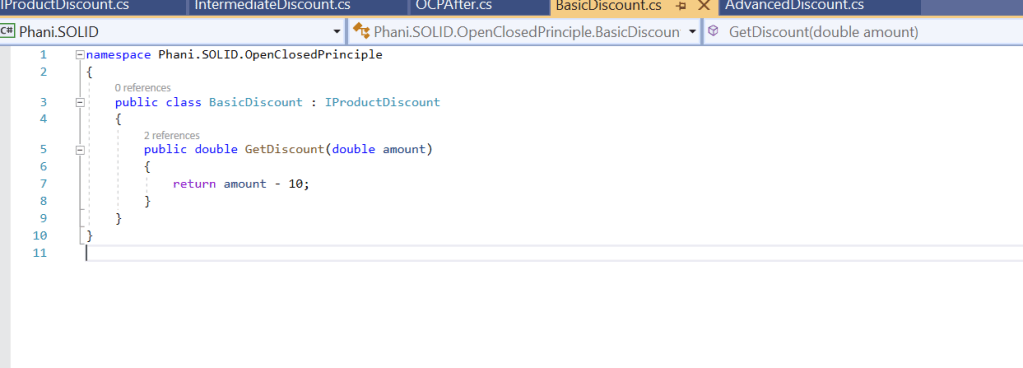
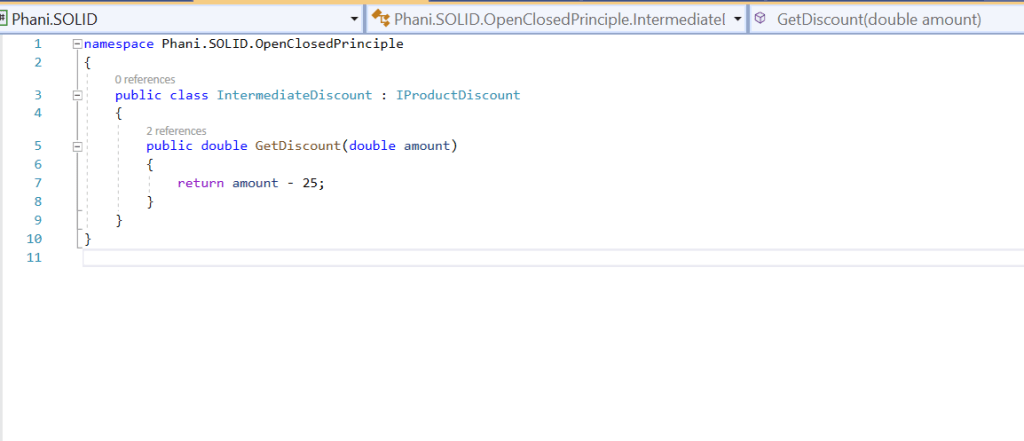
To fix this, we need to inherit the product type needed
Here I created 3 product discounts like
So they inherit IProductDiscount to get discounts.
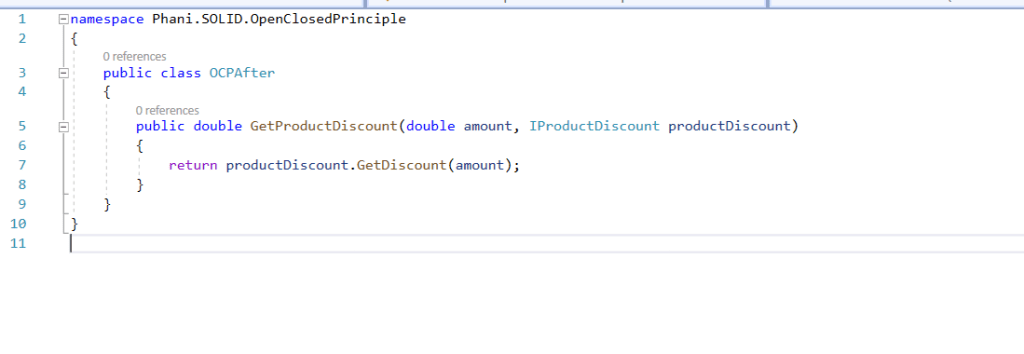
So after adding these changes, we will be passing the needed product discount by the client as
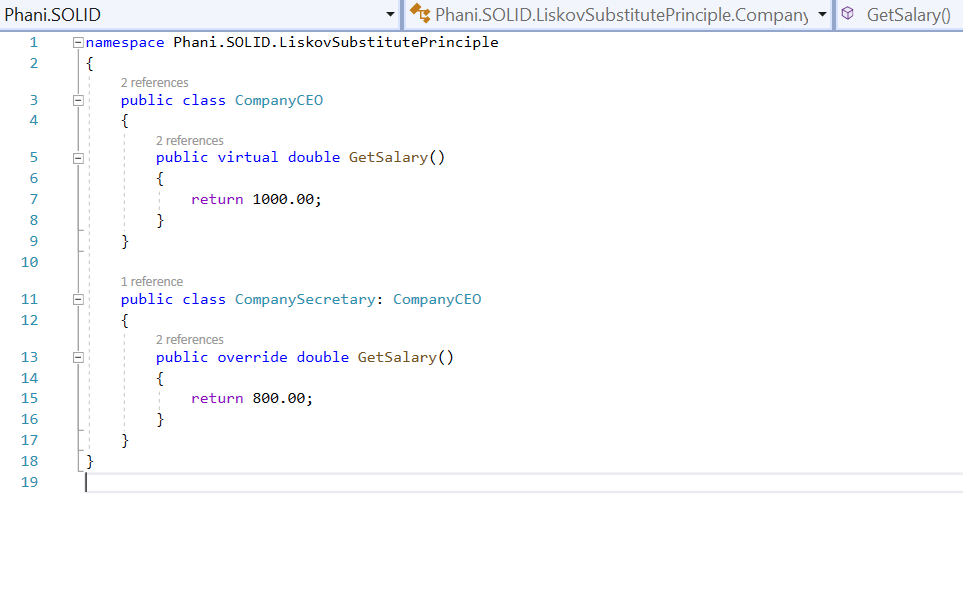
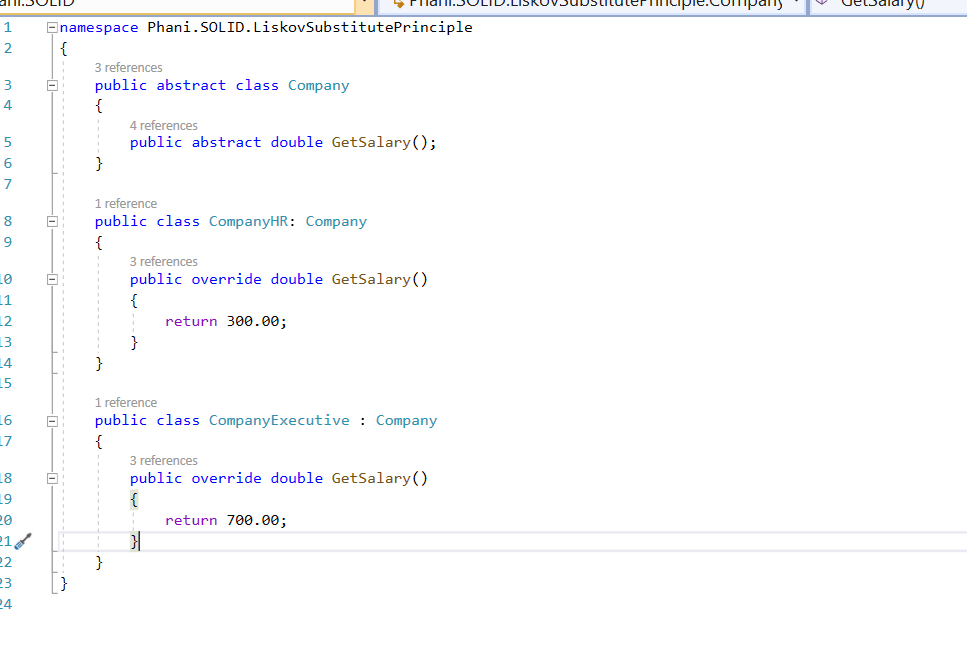
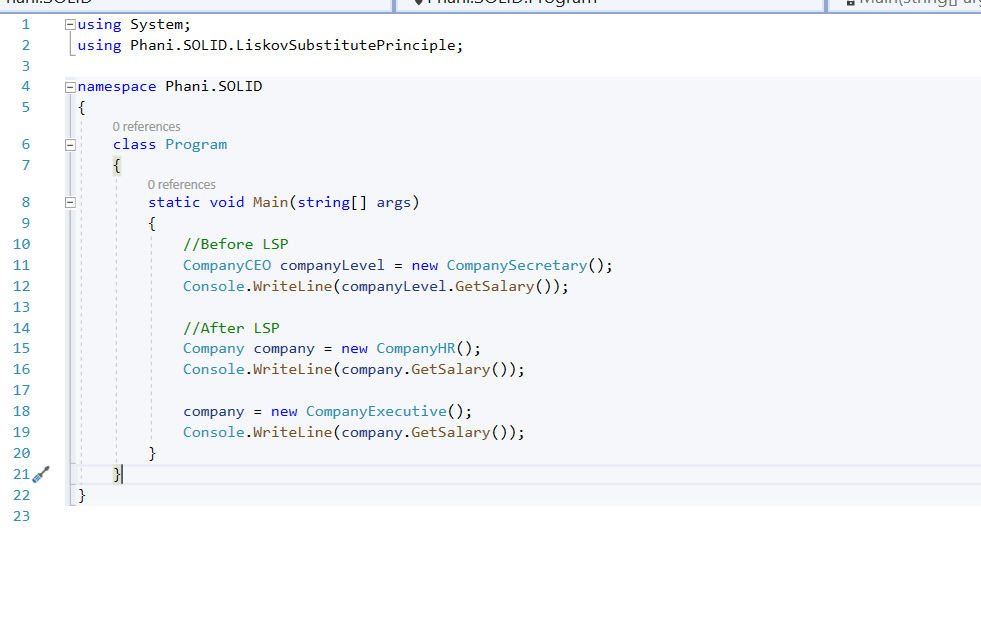
3.Liskov Substitue principle: As the name says, If X is a subtype of Y, then objects of Y type should be replaced by object of X type
See below LSP violation code
See the below after changing code.
We will be fixing this as:
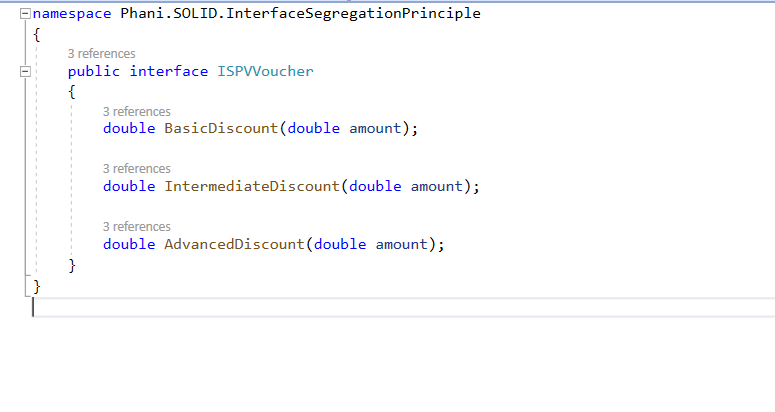
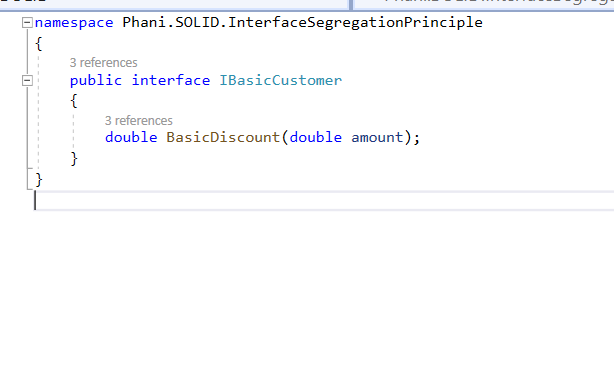
4.InterfaceSegregationPrinciple: It states that Clients should not be forced to implement any methods where they dont use.
As creating interface which is too big to handle , we need to create simple and small interface where each interface serving one purpose
If you see below interface there are 3 methods to get voucher discounts
for Basic Customer, he only needs implementation of BasicDiscount method. He doesnt need to know about Itnermediate/Advanced.
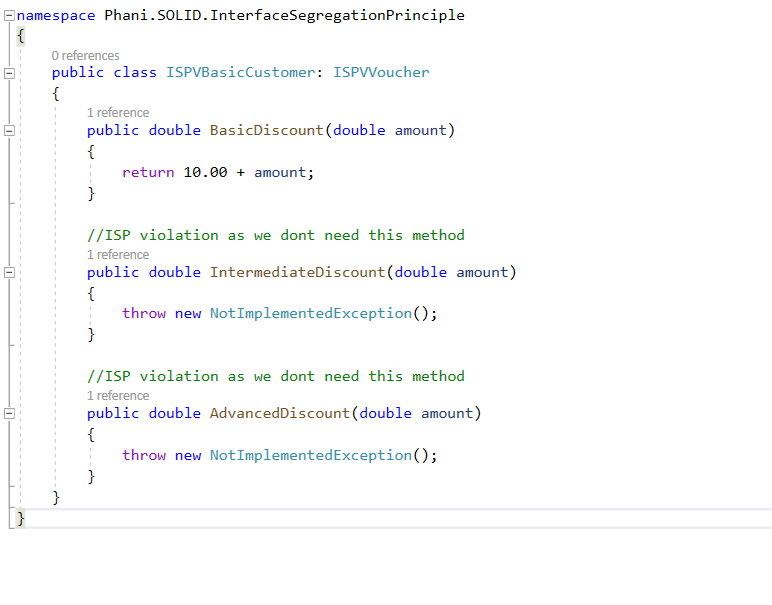
See below code which violates ISP
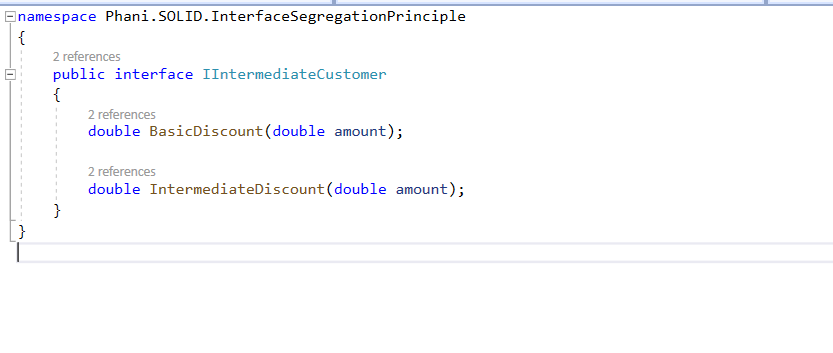
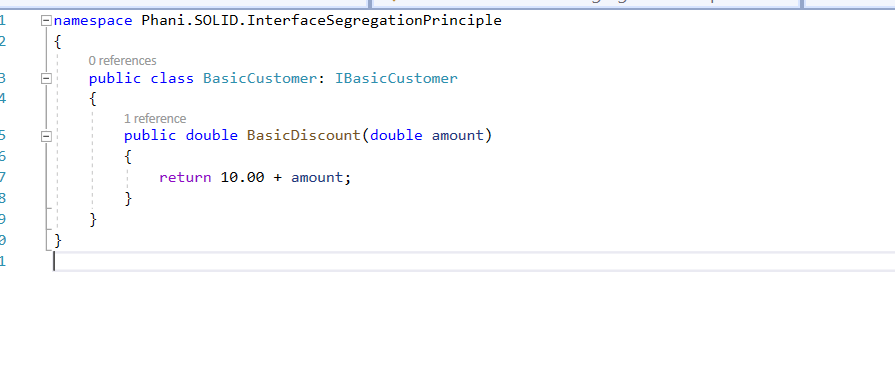
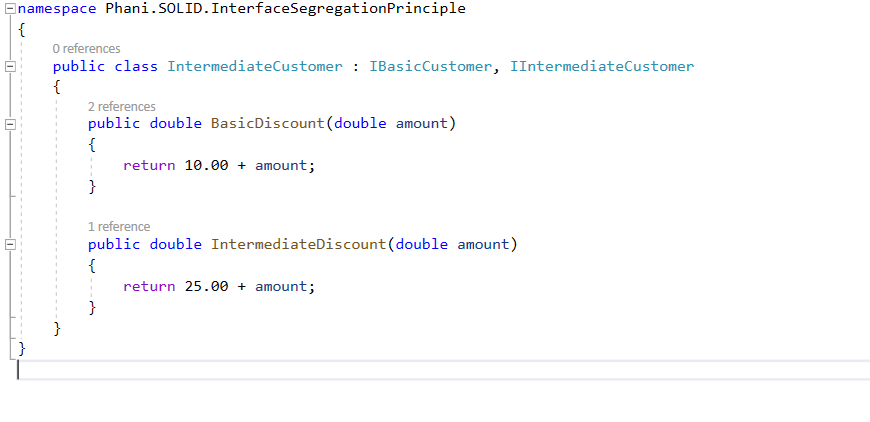
To fix this we need to create separate intefaces for Basic/Intermediate/Advacne d customers like:
Now to fix this violation, Basic Customer client needs only Basic discount method
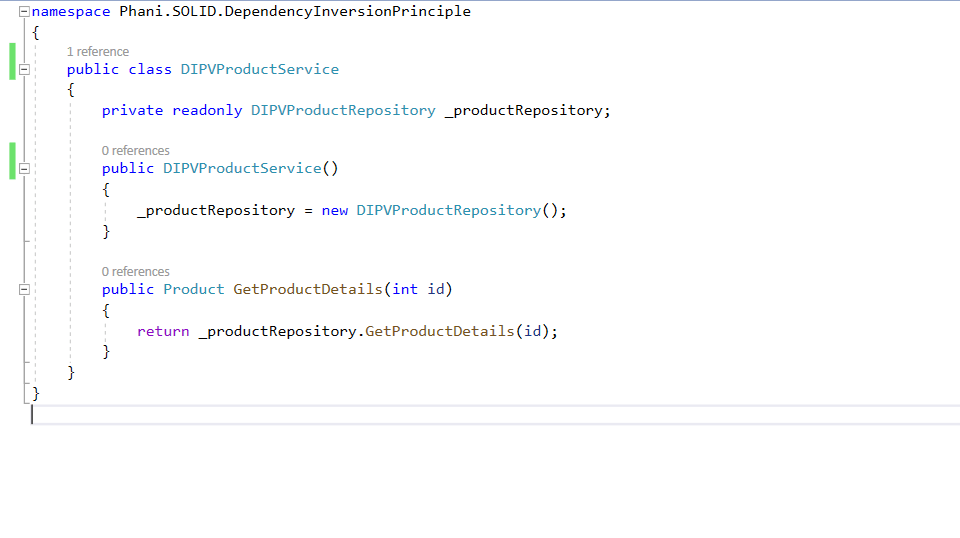
5.Dependency Inversion Principle: It states that high level modules should not depend on low level modules where they need to depend on abstractions. Abstractions should not depend upon details. Details should depend upon abstractions.
so to say we need an non-concrete interface/abstract class where we can’t create instance of it
See below code for DIP violation:
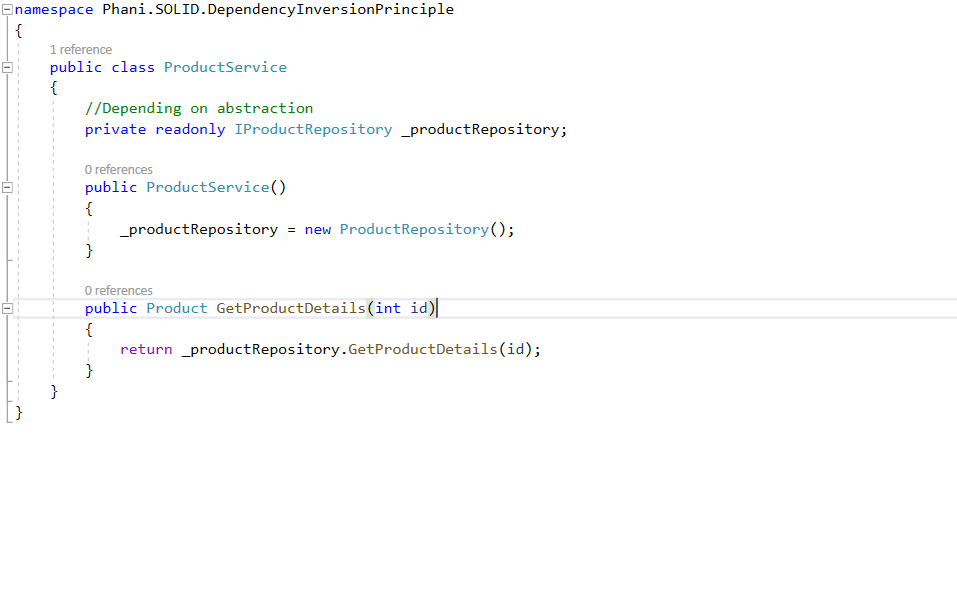
to fix DIP violation we need to create an interface of non concrete where we depend on abstraction
Docker is like a build container which will create/deploy/run applications
we can build all dependencies of an application into a package and ship as a docker image.
Once we have the image then we can run a container in any machine which runs docker. so we dont need to worry about other machine configurations. Like in our companies we have different environments like DEV/TEST/INT/QA environments.
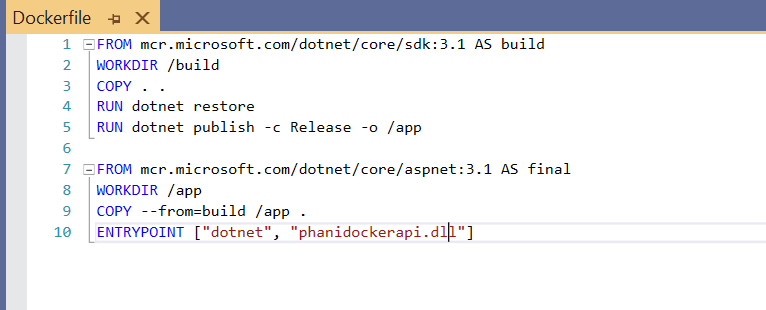
Create an Asp.Net Core application and create a dockerfile in it with no extension. I installed Docker Desktop in my machine and run it
My DockerFile is configured as below:
you can read from docker hub for more info about how to use these tags
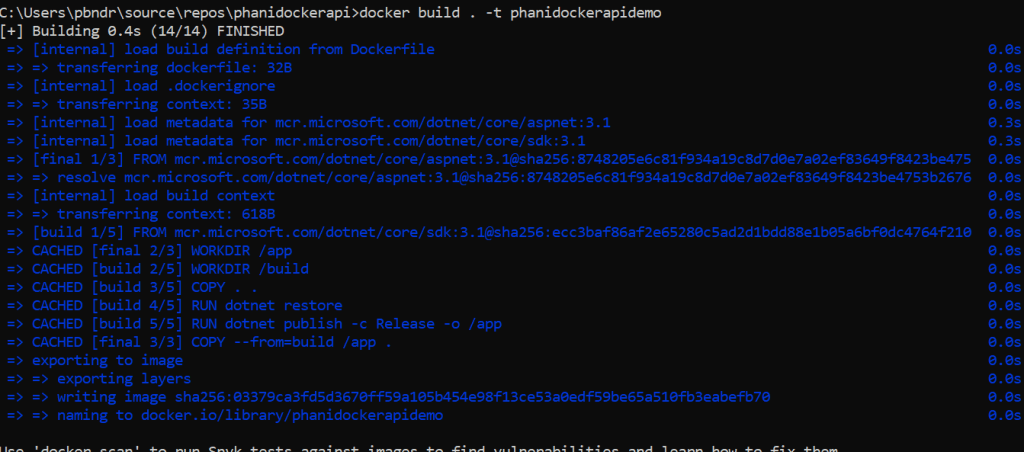
Now, we have our app and a dockerfile where we can build and package our code. Now lets create a docker image
Use docker build. -t phanidockerapidemo as below
-t tag is optional . it add a tag to our image
Now check the image created using docker images
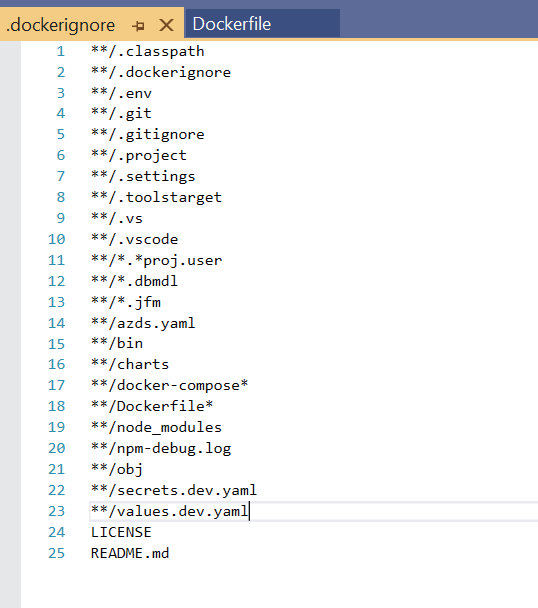
Here, you can see phanidockerapidemo image is created with size 208MB. we need to look at size for the load. use dockerignore to ignore files like bin,obj and more
Now we are ready to run our app, use the command
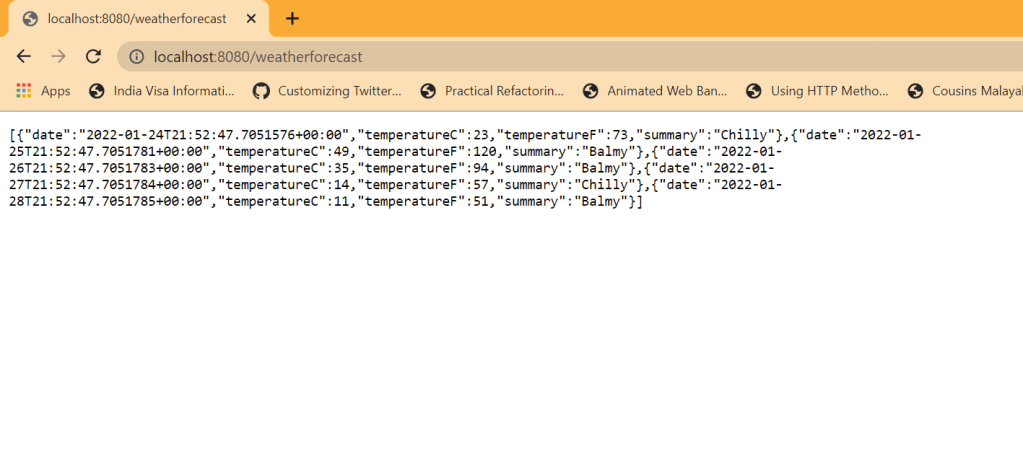
docker run -e message=”phani docker demo” -p 8080:80 phanidockerdemo
‘e’ tag is to add an environment variable into our running container. Message is optional
‘-p’ tag is for mapping from my host port to container port. Here 8080 is my host listener.
Now just browse our app. you will see our app will be running without running VS
You can do more like push your docker image to docker hub, tag it and share the image.
Exception Handling is important to handle any type of system errors, some known /unknown errors.
Usually when we deal with code we will throw an exception in try-catch block to catch exceptions
Like below we throw the exception
try {
//code
} catch(Exception ex) {
// do semthig with exception
}
When exception occurs, we see stack trace for the exception . sometimes the exception contains lot of unncessary information which looks bit confusing and the exception wont be structured
We need to make sure every exception is handled and error response and data is handled correctly
.Net core has its own native error handling. we can also build our own custom exception handler to catch and handling the errors. This custom one will listen to all request and responses
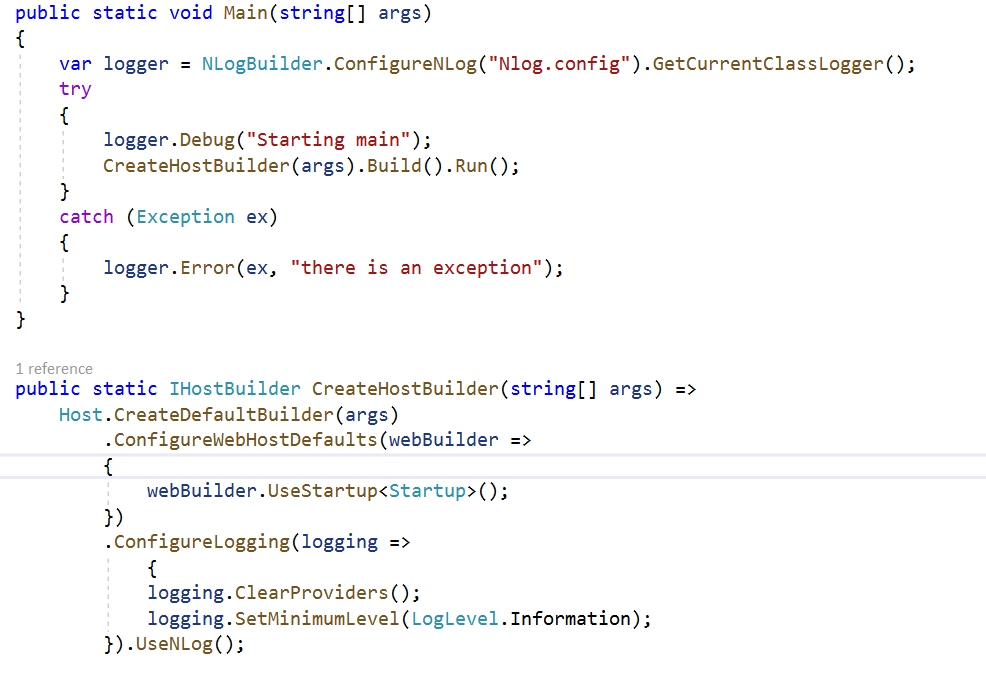
We will be enabling this middleware exception handler before all usage calls
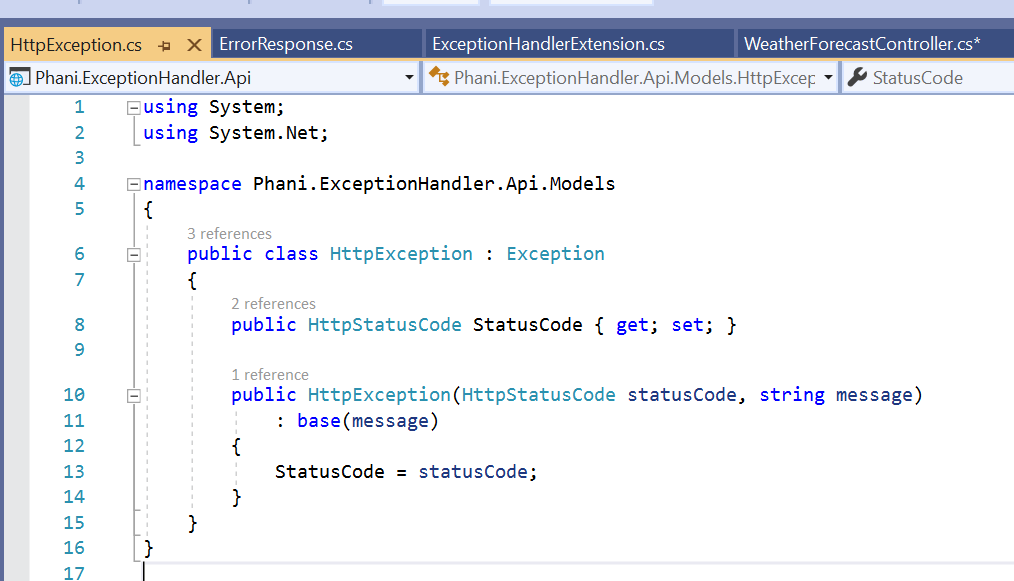
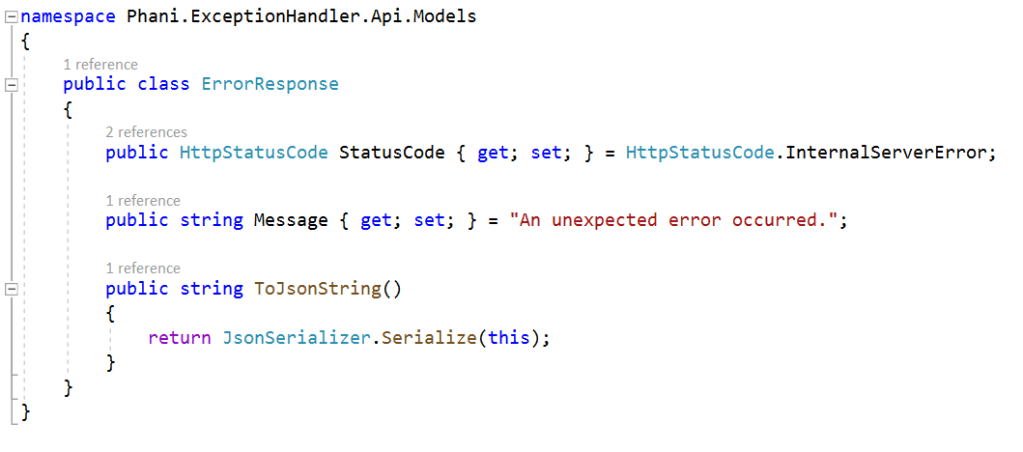
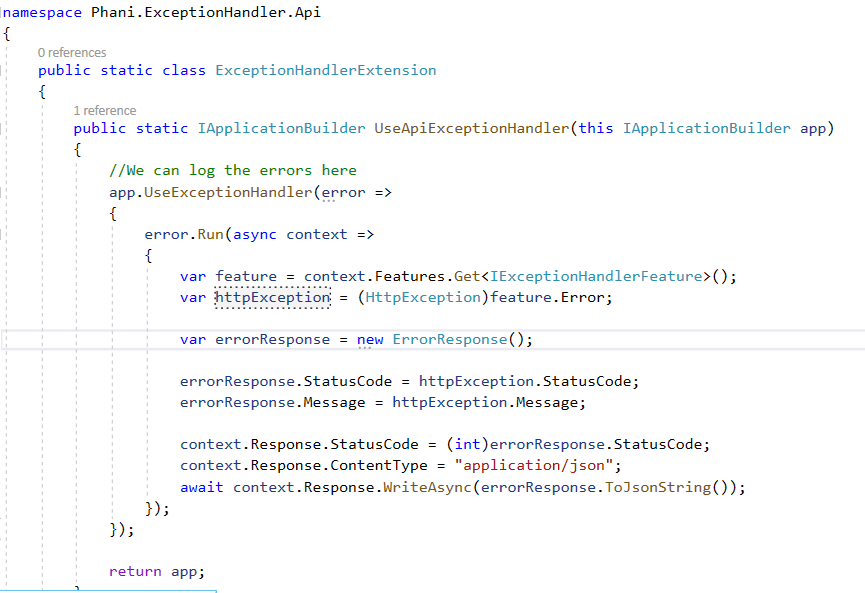
I created custom HttpException, ErrorResponse and ExceptionHandlerExtension for handling exceptions
Now, i created custom exception handler
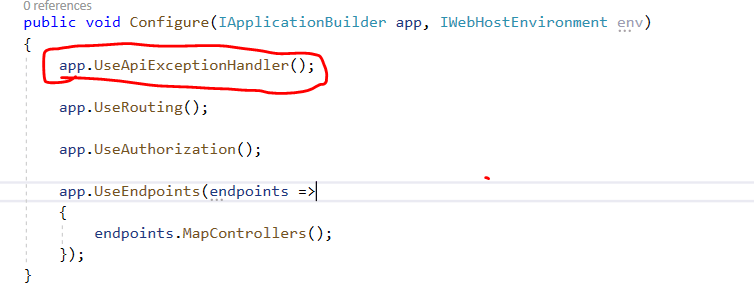
Now, call this expcetion handler from startup configure method and use it as first call
app.UseApiExceptionHandler();
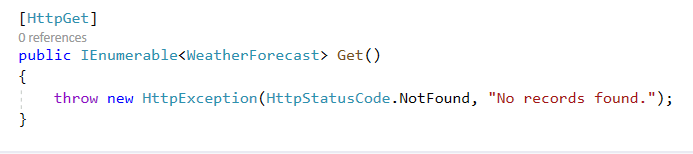
Now, throw an exception in code
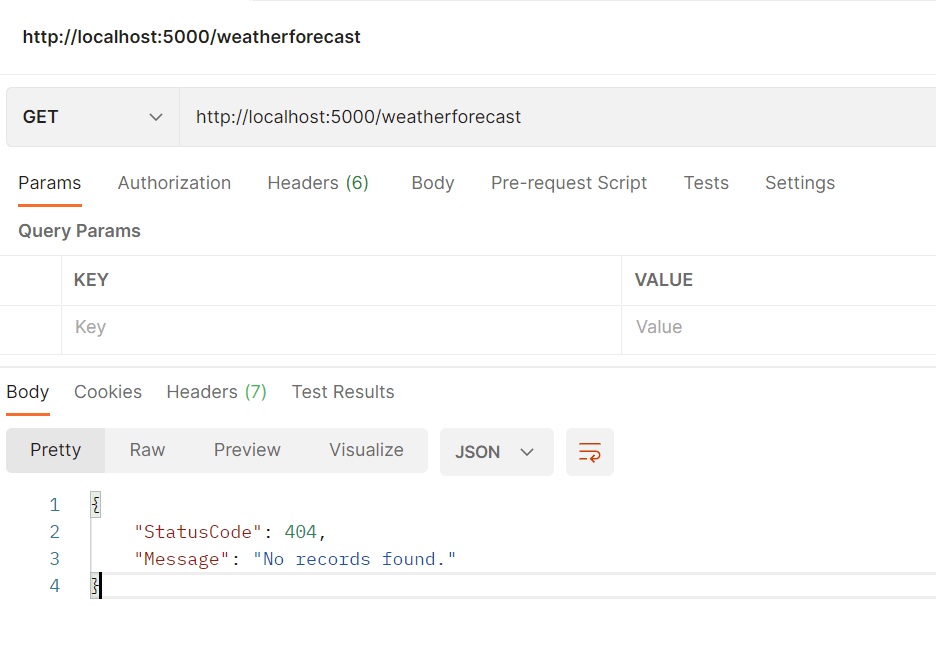
and run in postman and you can see a proper response as:
If you throw without custom exception you see the message “an unexpected error occured.” with statuscode 500
By throwing proper custom exception with proper status code it will help us to find any issue.
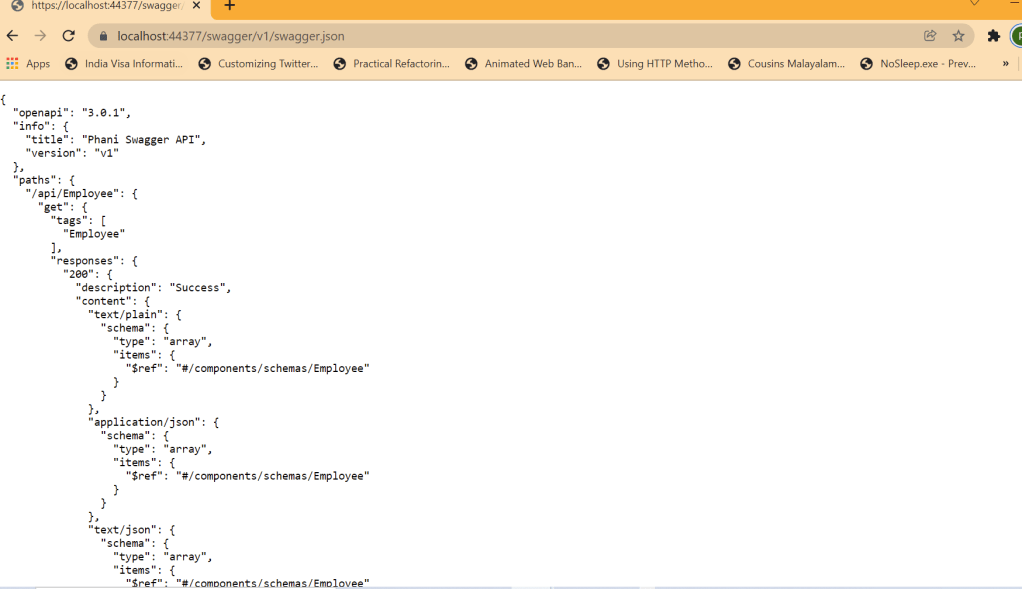
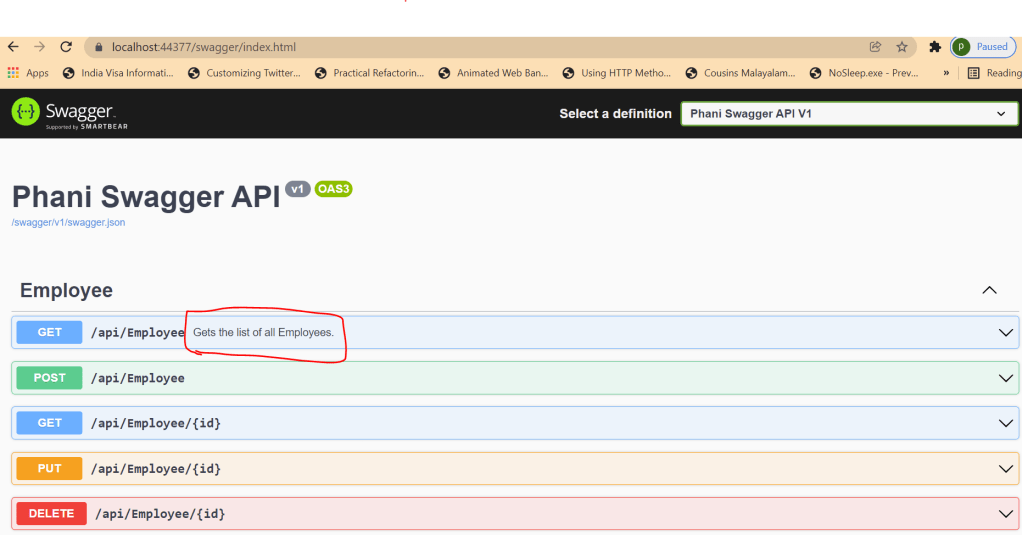
Note: the port 44377 will be different to your local
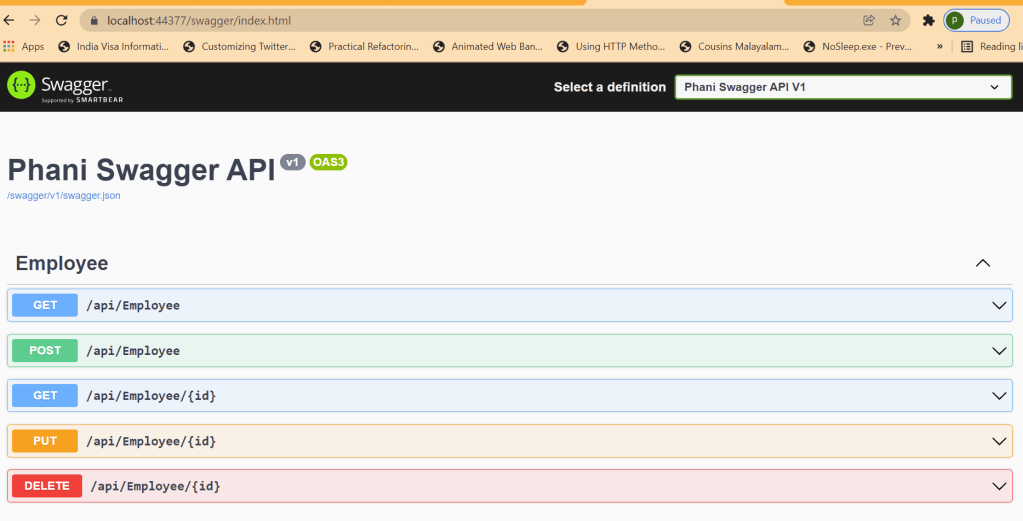
You can click Try it out and can see the results with Status codes, Request and Responses.
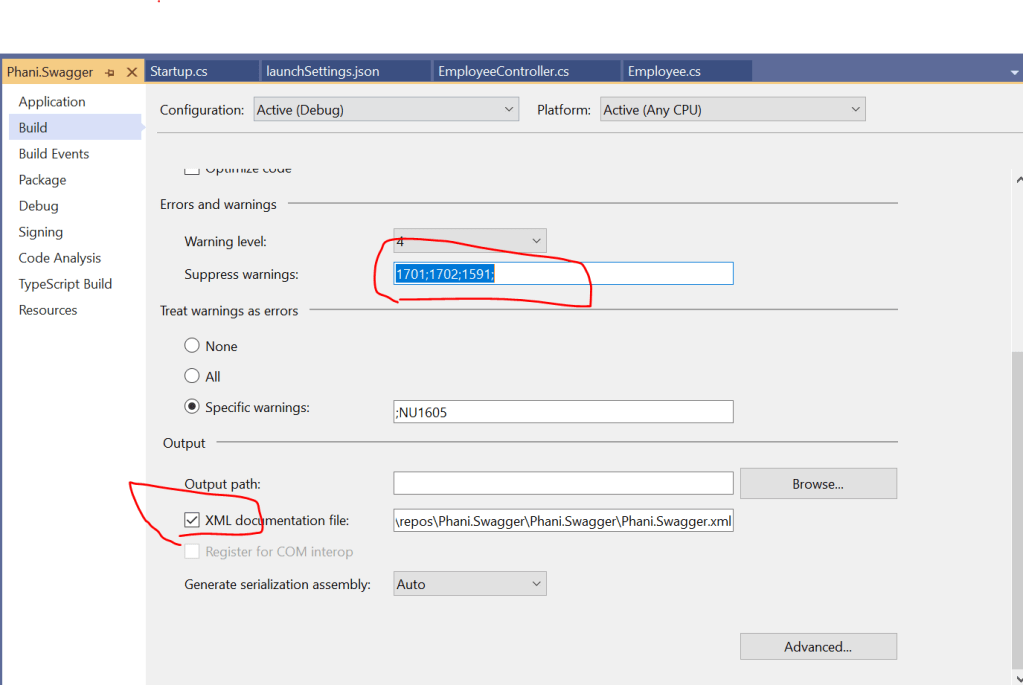
Now we can enable XML comments for the summary of the actions by changing the project build. Here add 1591 to supress warnings in the controller
and configure xml comments in the services as:
// Set the comments path for the Swagger JSON and UI.
            var xmlFile = $"{Assembly.GetExecutingAssembly().GetName().Name}.xml";
            var xmlPath = Path.Combine(AppContext.BaseDirectory, xmlFile);
            c.IncludeXmlComments(xmlPath);
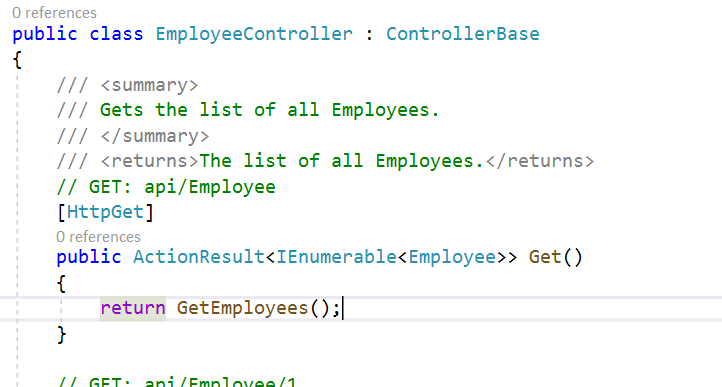
Add the summary for any controller you need
Now run the app and can see the added summary description for the endpoint
You can add more like ResponseType for the endpoints, and css changes for the swagger.